-
20. Putting your code in the right place: a brief introduction to prg banking
21. Giving your main character a sword
22. Adding more features to the pause menu
23. Adding a second map
24. Saving the Game
25. Adding objects that attract or repel the player
26. Adding an enemy that mimics player behavior
27. Adding a new sprite size
-
40. Understanding and tweaking the build tools
41. Dealing with limited ROM space
42. Resizing your rom
43. ROM Data Map
44. Expanding available graphics using CHR banking
45. Getting finer control over graphics with chr ram
46. Writing Functions in Assembly
47. Automatic builds with GH Actions
48. Switching to unrom 512 for advanced features
Adding NPCs and NPC text
Sometimes you want to add a random person or character to your game that isn’t an enemy. Perhaps this person just wants to talk to you. This engine aims to make that really easy! There is a default character built into the rom, and we can change what it says, or make more.
The basics, adding NPCs
Our NPCs are really just regular sprites with a little extra logic to control them. We will walk through adding a new
sprite, and customizing what it has to say. Sprites are defined in source/c/sprites/sprite_definitions.c - there is
one NPC already in this array. The main thing is the type being set to SPRITE_TYPE_NPC. Here is the example npc:
// The rest of the sprites are above this...
SPRITE_TYPE_NPC, 0x00, SPRITE_SIZE_16PX_16PX | SPRITE_PALETTE_1, SPRITE_ANIMATION_NONE, SPRITE_MOVEMENT_NONE, 0x00, 14, 0x00
To note, there is nothing else special about this sprite right now - you can set the animation to anything, and you
can also enable full movement with SPRITE_ANIMATION_FULL. This just depends on your sprites! There is more detail
about how to customize sprites Adding new Enemies chapter. It is suggested you add a new
enemy type first to get more familiar with this.
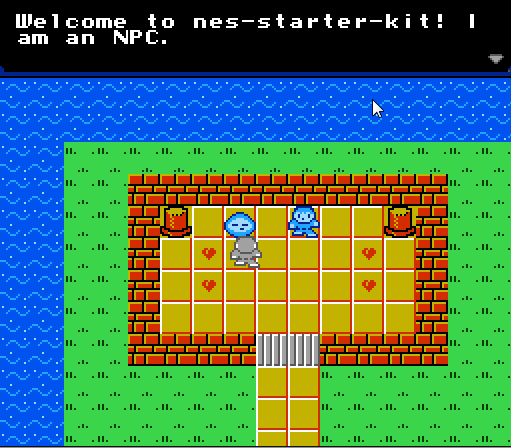
Let’s add a new sprite below this one with a different appearance. Let’s make a friendly slime! You can find the tile
ID from looking at graphics/sprites.chr in NES Screen Tool. (Also load graphics/palettes/main_sprites.pal to fix
the colors too, as needed.) The top slime sprite has an id of 0x40, so we’ll use
that. We’ll also use SPRITE_PALETTE_1 to use the blue palette other sprites use. Finally, we will keep it still by
using SPRITE_MOVEMENT_NONE but let it animate between two tiles with SPRITE_ANIMATION_SWAP.
Finally, and most importantly, we also change the 6th byte, which we label as miscellaneous in the documentation, to
0x01 - this will help us tell the difference between this sprite and the one above later on. Don’t miss it! Also be
sure to add a comma to the end of the first SPRITE_TYPE_NPC row.
Here’s the end result:
// The rest of the sprites are above this...
SPRITE_TYPE_NPC, 0x00, SPRITE_SIZE_16PX_16PX | SPRITE_PALETTE_1, SPRITE_ANIMATION_NONE, SPRITE_MOVEMENT_NONE, 0x00, 14, 0x00,
SPRITE_TYPE_NPC, 0x40, SPRITE_SIZE_16PX_16PX | SPRITE_PALETTE_1, SPRITE_ANIMATION_SWAP, SPRITE_MOVEMENT_NONE, 0x01, 14, 0x00
Save this, and then either build your game. Now you should see your new sprite available in
Tiled. (Go to File -> Reload if not; it doesn’t always pick this up!) Add it to the first tile with the other NPC,
and be sure to add it to the Sprites layer. Once this is done, save and rebuild your game. When you open it, you
should see this sprite, and he’ll say the same thing as the default one! (Note: The sprite’s text changes if put on
a tile other than the top-left one.)
Making NPCs say unique things
So, this is cool, but you probably wanted your NPC to say something unique, huh? For this part we’ll have to write
a little actual code. It’s not too scary, though. First, we have to define what text we actually want to show. For
the simple demo, we just did this in source/c/sprites/player.c. Towards the top of the file, you will see some strings
defined:
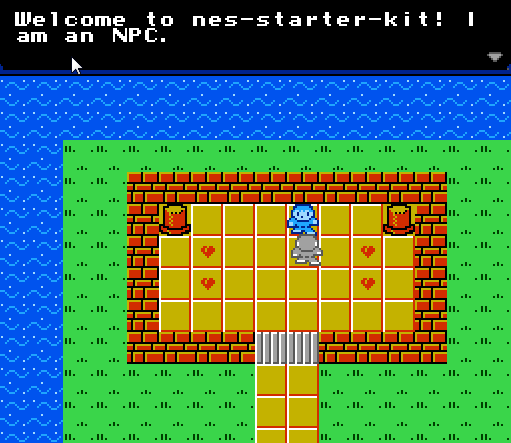
 const unsigned char* introductionText =
                                "Welcome to nes-starter-kit! I "
                                "am an NPC.                    "
                                "                              "

                                "Hope you're having fun!       "
                                "                              "
                                "- The developer";
const unsigned char* movedText =
                                "Hey, you put me on another    "
                                "screen! Cool!";
You may recognize these as what the NPCs built into the engine say. The engine knows how to take a string like this and
show it on-screen. It can be of any length, and will be broken up automatically. You may note that the string
formatting is a little bit weird. Strings in C can comprise of multiple "quoted" "pieces" and the compiler will
merge those strings into one.
Our engine shows 30 characters per-line, and is not smart enough to break up words, so we have to do this ourselves. In the engine, we format the text to be 30 characters per line so we can know exactly what it will show up like in-game. We also show 3 lines on screen at a time.
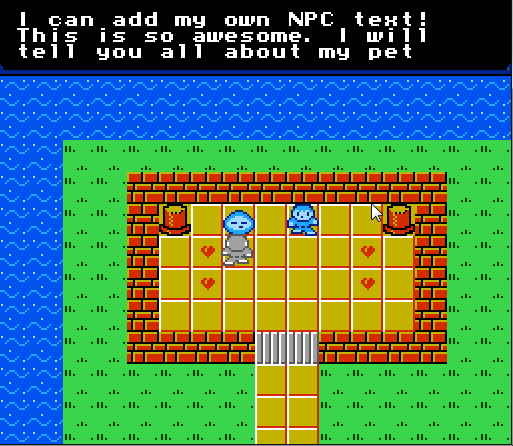
Let’s add some new text for our new sprite to always show. I suggest adding something like this below movedText:
const unsigned char* newNpcText =
                                "I can add my own NPC text!    "
                                "This is so awesome. I will    "
                                "tell you all about my pet     "

                                "bunny. He is soft and fluffy  "
                                "and imaginary.                "
                                "                              "

                                "I wish I had a pet bunny.";
Next, we need to make that text actually show up somewhere. For the demo, we put some logic further down in
source/c/sprites/player.c that shows this text when you press A to talk to a sprite. Find the
handle_player_sprite_collision() method, and look for the case SPRITE_TYPE_NPC section. It will look something
like this:
case SPRITE_TYPE_NPC:
    // Okay, we collided with this NPC before we calculated the player's movement. After being moved, does the
    // new player position also collide? If so, stop it. Else, let it go.

    // Calculate position...
    // (Actual collision code left out; it's not important for this bit)

    if (controllerState & PAD_A && !(lastControllerState & PAD_A)) {
        // Show the text for the player on the first screen
        if (playerOverworldPosition == 0) {
            trigger_game_text(introductionText);
        } else {
            // If it's on another screen, show some different text :)
            trigger_game_text(movedText);
        }
    }
    break;
That little if statement (looking at playerOverworldPosition, the screen the player is on) at the bottom is all
there is to it right now! We want to change how it works a little bit for our new string. The easiest way is to
put another if statement around this that looks at the value we set earlier. We have to do a little work to find
that information, but once we do we can call trigger_game_text(nameOfString) to start showing the text.
Here’s the updated if statements with our new string:
    if (controllerState & PAD_A && !(lastControllerState & PAD_A)) {

        if (currentMapSpriteData[(currentMapSpriteIndex) + MAP_SPRITE_DATA_POS_NPC_ID] == 1) {
            trigger_game_text(newNpcText);
        } else {
            // Show the text for the player on the first screen
            if (playerOverworldPosition == 0) {
                trigger_game_text(introductionText);
            } else {
                // If it's on another screen, show some different text :)
                trigger_game_text(movedText);
            }
        }
    }
Sprite data is copied here from sprite_definitions, and ends up in a different place. That said, we have a constant
called MAP_SPRITE_DATA_POS_NPC_ID that points us to this spot, so we can just use this. (All sprite data for the
current map is stored in the currentMapSpriteData array, with 16 bytes per sprite.)
If you launch the game again after making this change, your new sprite should tell you about its imaginary bunny. Good news!
Advanced techniques for having many NPCs
This technique works, but it will fall apart if you have a lot of sprites. It’s ugly to have them all in one file, and in addition you might find yourself filling most of a bank with text. There are a few things we could do to make this situation a bit better.
The first thing you can do is move this logic to a separate function in a new file. You would want to name this file
clearly, something like source/c/sprites/npc_text.c with a source/c/sprites/npc_text.h file to go with. You also
will want to put this into a separate code bank, using CODE_BANK(). You then would have to use banked_call() to call
this code. Here’s an example of what it might look like:
source/c/sprites/npc_text.h:
#define PRG_BANK_NPC_TEXT 6

void trigger_npc_text(void);
source/sprites/npc_text.c:
#include "source/c/map/map.h"
#include "source/c/graphics/game_text.h"
#include "source/c/sprites/map_sprites.h"

CODE_BANK(PRG_BANK_NPC_TEXT);

const unsigned char* firstText = "First text!";
const unsigned char* secondText = "Second Text!";
const unsigned char* thirdText = "Third Text!";
const unsigned char* missingText = "Text for NPC not set!";

void trigger_npc_text(void) {
    switch (playerOverworldPosition) {
        case 0:
            trigger_game_text(firstText);
            break;
        case 1:
            if (currentMapSpriteData[(currentMapSpriteIndex) + MAP_SPRITE_DATA_POS_NPC_ID] == 0) {
                trigger_game_text(secondText);
            } else {
                trigger_game_Text(thirdText);
            }
            break;
        default:
            trigger_game_text(missingText);
            break;
    }
}
source/c/sprites/player.c:
    // Add the #include for "source/c/sprites/npc_text.h" to the top; don't forget!
    if (controllerState & PAD_A && !(lastControllerState & PAD_A)) {
        banked_call(PRG_BANK_NPC_TEXT, trigger_npc_text);
    }
This will let you put all of your text in a separate prg bank, so you don’t have to worry as much about how much space your text takes up. (You’ll be surprised how much it uses!)
There are ways we could enhance this further using compression, but they are beyond the scope of this chapter.