-
20. Putting your code in the right place: a brief introduction to prg banking
21. Giving your main character a sword
22. Adding more features to the pause menu
23. Adding a second map
24. Saving the Game
25. Adding objects that attract or repel the player
26. Adding an enemy that mimics player behavior
27. Adding a new sprite size
-
40. Understanding and tweaking the build tools
41. Dealing with limited ROM space
42. Resizing your rom
43. ROM Data Map
44. Expanding available graphics using CHR banking
45. Getting finer control over graphics with chr ram
46. Writing Functions in Assembly
47. Automatic builds with GH Actions
48. Switching to unrom 512 for advanced features
Making Your First Change
Okay, you’ve set up a bunch of tools, built the game, and even played it briefly. You’re probably wondering when you get to start making your own game. The answer is, right now!
Let’s do something really simple to start - let’s change the title screen a bit. Pick a name for your game now. (Don’t stress over it; this will be easy to change later!) We are going to change the title screen to show it.
First, use your IDE to open source/c/configuration/game_info.c. You should see a fairly simple file.
In fact, it just has a few constant variables with details about your game. It should look something
like this:
// A bunch of information about your game - used on the title screen, as well as
// the credits, and anywhere else you fancy!
const unsigned char gameName[] = "Quirk's Adventure";
const unsigned char gameAuthor[] = "YOU!";
const unsigned char gameAuthorContact[] = "Tweet at us! @your_twitter";
const unsigned char currentYear[] = "2018";
These are all C strings used later in this file to draw the name on the title. (and a couple other
places.) Change the text after gameName[] to be the name of your game. If your game name contains
quotes ("), be sure to escape the character using a backslash. (\")
The next line is the game’s author. Change this to your name, or some other way you like to be identified.
The line after is a way to contact you - we used Twitter in our example, but change this to whatever
you like! Or, set it to an empty string ("") to remove it entirely.
If you want to see the code that uses this, look at source/c/menus/title.c. No need to change
it yet!
Now, compile and run the game again (Press ctrl+shift+b in Visual Studio Code, or run
create-nes-game build && create-nes-game run in the Cygwin terminal).
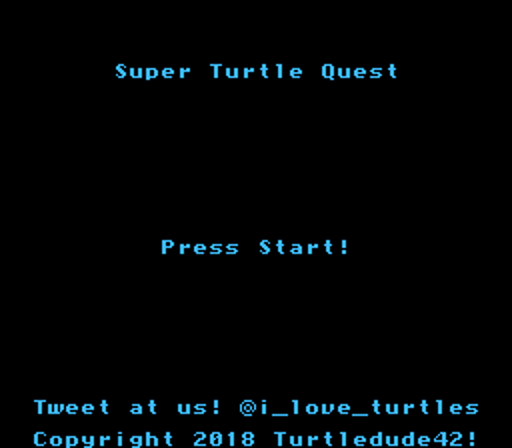
The title screen should now show your game name and author. Congratulations, you’ve officially started programming your NES game!